
If you're like me, you love the thrill of being out with your camera, taking photos, and enjoying the beauty of nature.
But, again, if you're like me, sitting at home processing photos in Lightroom isn't exactly the most exciting experience.
That's why I was so excited when I came upon the quick and efficient Lightroom post processing techniques in the video above.
Follow along in the video as master bird photographer Tim Boyer explains how to make your bird photography shine in just a few minutes.
For a rundown of some of Tim's essential steps, check the outline below.
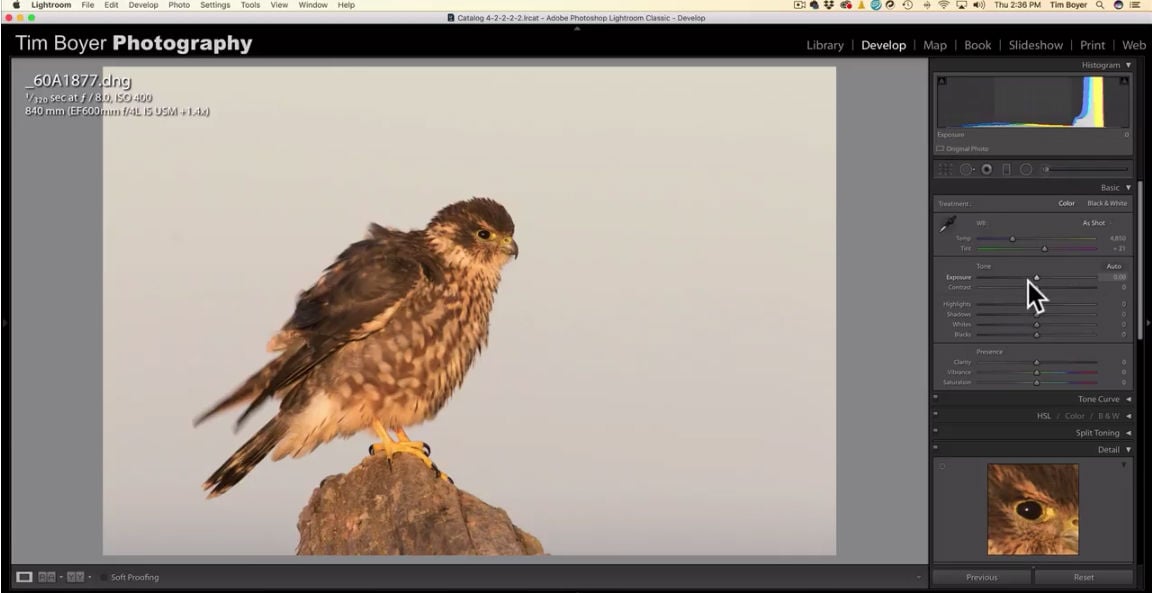
Step 1: Prepare the Workspace
 YouTube Screenshot/Tim Boyer
Particularly if you're processing photos in Lightroom on a laptop or a small screen, you need to prepare the workspace to maximize the real estate on the screen.
That includes hiding the panel on the left side of the screen to give yourself more space to devote to the photo.
Then drag the tools panel on the right side of the screen over to the left to increase its size a little bit.
Not only does this give you a better view of the tools you'll be using, but it also extends the length of the sliders in the panel, which gives you finer control over the adjustments you make.
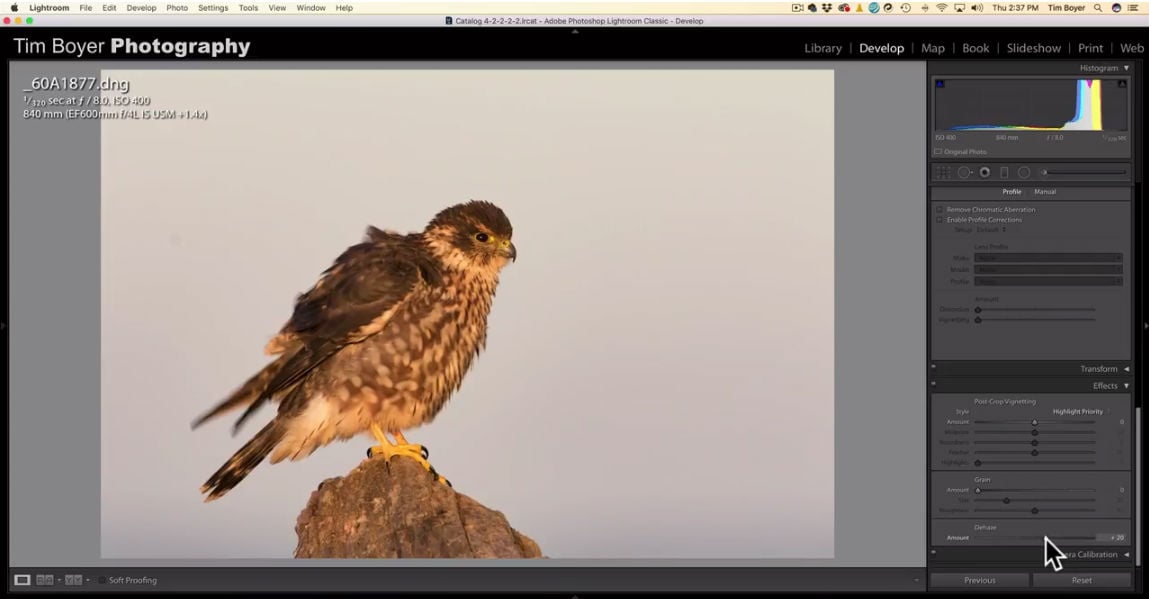
Step 2: Dehaze is a Handy Lightroom Post Processing Technique
 YouTube Screenshot/Tim Boyer
Tim's first step in processing his bird photos is to use Lightroom's Dehaze feature.
Dehaze adds some clarity to the shot while increasing the contrast, too.
It also cleans up the shot a little bit. In Tim's sample image, there was a lot of mist in the air, so dehazing the image helps minimize the softness of that mist for a crisper shot.
In the screenshot above, you can see the Dehaze tool at the bottom of the panel, where the cursor appears.
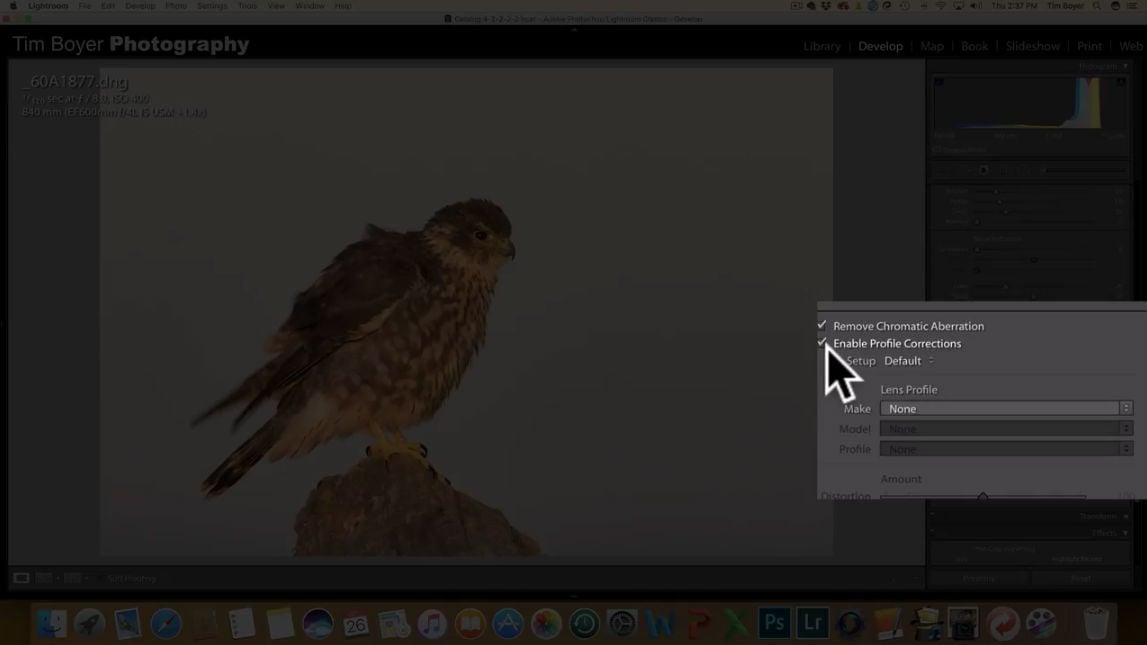
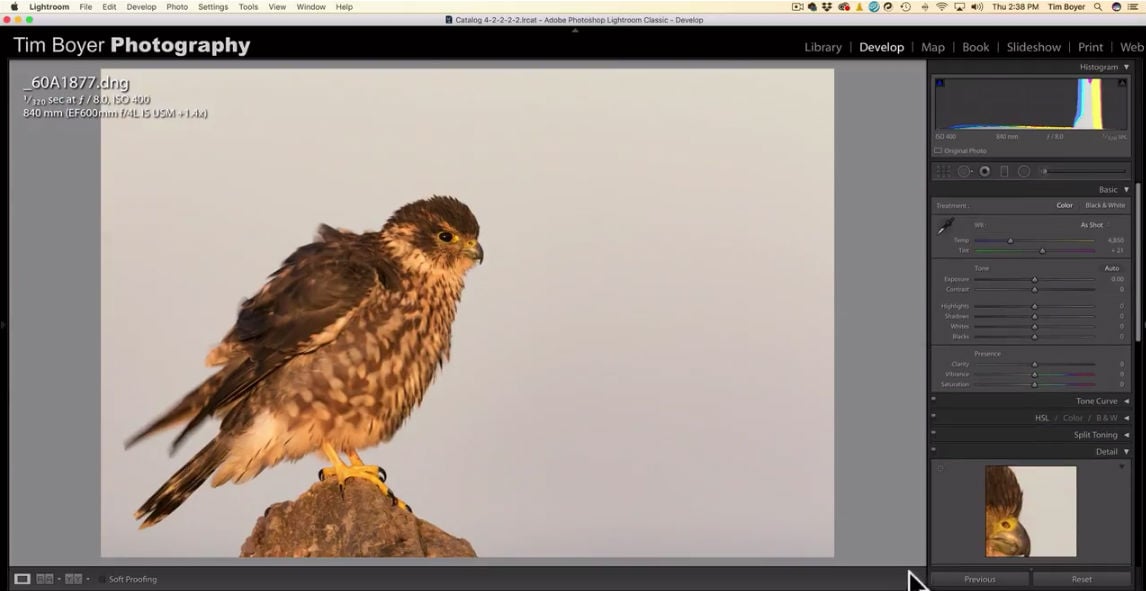
Step 3: Use Lens Correction
 YouTube Screenshot/Tim Boyer
In the Lens Correction Panel, click the boxes for Remove Chromatic Aberration and Enable Profile Corrections.
Doing so improves the image slightly, removing the color fringing that sometimes occurs as a result of chromatic aberration. It also corrects for distortion based on the specific lens you used to take the shot.
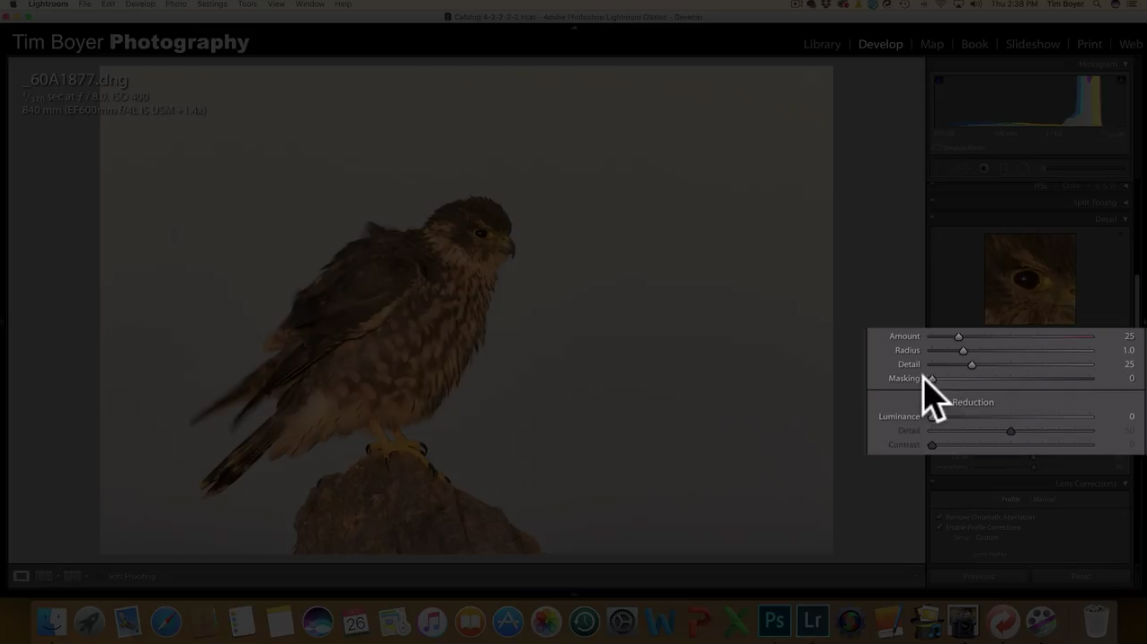
Step 4: Sharpen the Image
 YouTube Screenshot/Tim Boyer
Try as you might, your bird photography might not be optimally sharp each time.
Lightroom's Sharpening tools can help you fine-tune the image's sharpness if need be.
First, create a sharpening mask, which will turn the image into an array of white and black tones.
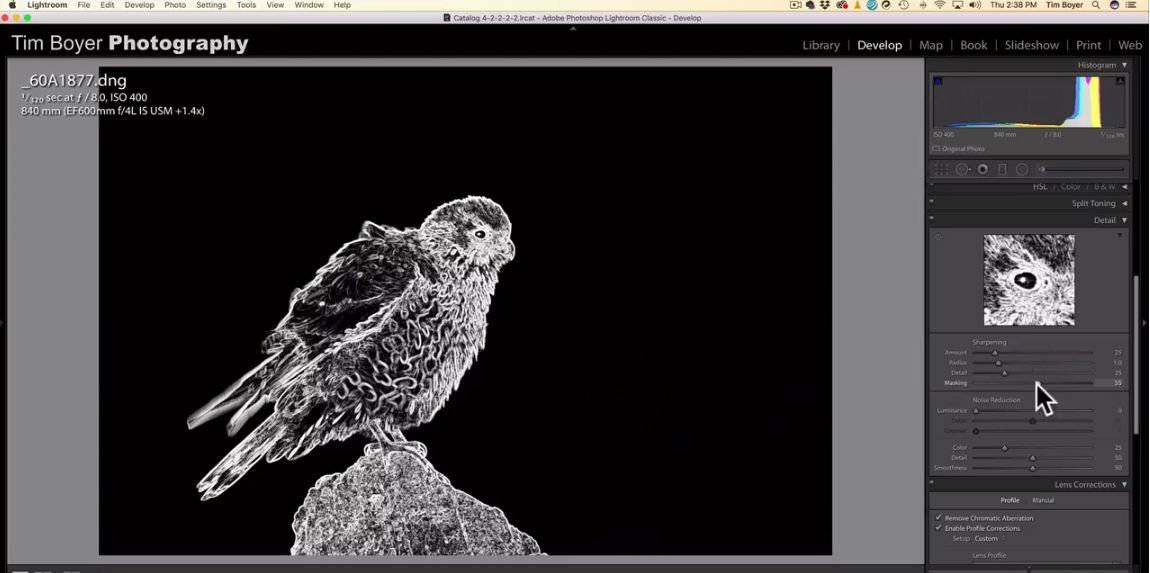 YouTube Screenshot/Tim Boyer
As you can see in the screenshot above, these white and black tones make it easy to see the details of the shot.
By creating the mask, only the white areas will be sharpened, though. That helps ensure that you're sharpening the bird and the bird only, and not the background, which could increase noise in the sky area of the image.
Sharpening the image is easy - just use the sliders in the Sharpening panel to get the results you want. You don't need to go big here, as small adjustments can go a long way.
Step 5: Crop and Remove Dust
 YouTube Screenshot/Tim Boyer
Though your image might not need to be cropped, this is a good point at which to do it.
As you can see in the screenshot above, Tim cropped the image slightly in order to fill more of the frame with the bird.
What's more, he positioned the bird in the frame such that its tail and eye are on a 45-degree angle, which is a pleasing view.
 YouTube Screenshot/Tim Boyer
Tim also uses the Spot Removal Brush to get rid of some artifacts in the shot left by dust on his camera's sensor.
To do so, engage the Spot Removal Brush, and then click the Visualize Spots box at the bottom of the Lightroom window.
Doing so enables you to adjust the slider to bring out any obvious spots in the image.
As you can see, Tim found a dust spot on the far left side of his image that he then removes by using the Spot Removal Brush.
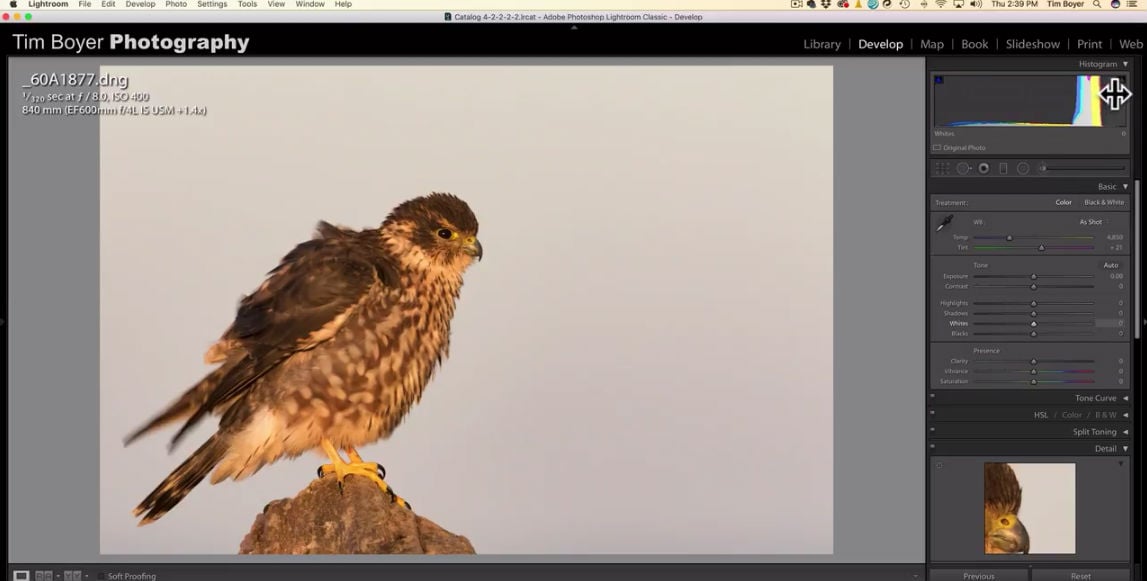
Step 6: Fine-Tune the Exposure
 YouTube Screenshot/Tim Boyer
The histogram in Lightroom offers you a look at the tones that are present in the image.
Typically, a nice bell-shaped curve with the highest peak of the graph in the middle is what you want.
But sometimes that's not what you get, and as you can see, Tim's histogram is skewed to the right due to the brightness of the sky behind the bird.
But if you look closely, there's a small triangle in the upper-left portion of the histogram, which indicates that some black areas of the image are being clipped.
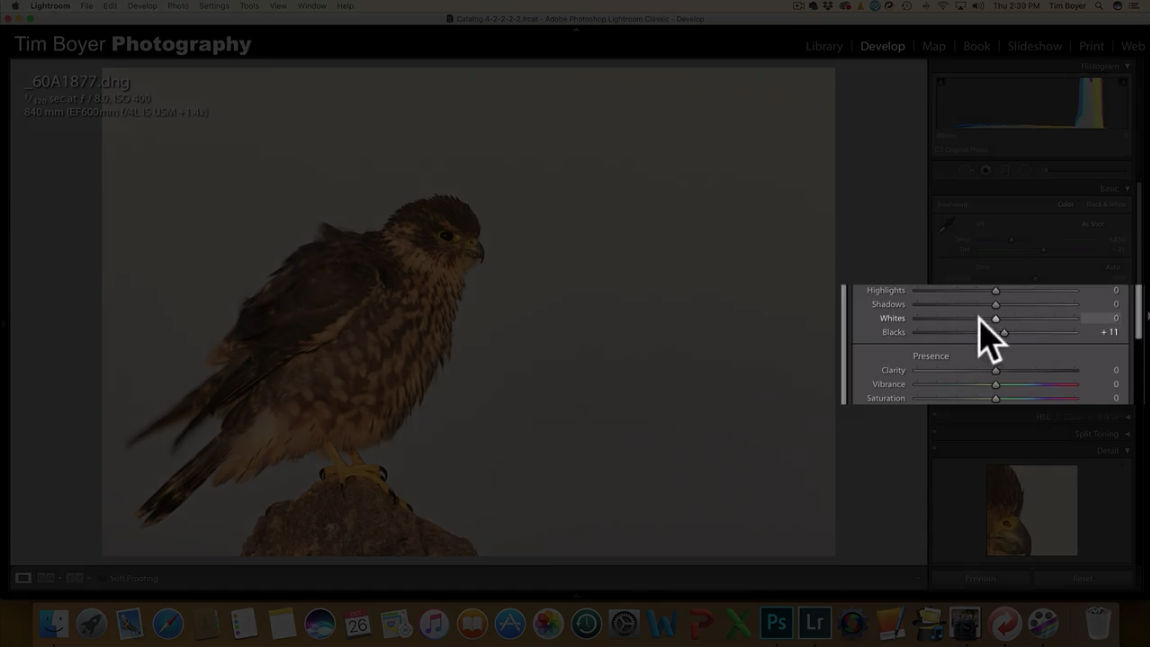 YouTube Screenshot/Tim Boyer
Using the Blacks Slider, Tim increases those values to bring some of those darker areas of the shot back into the image.
Again, it doesn't take much, so making adjustments like this should be done with the idea that less is more.
Manipulating the Highlights, Shadows, and Whites can also help you fine-tune the exposure to get the results that you want.
With that, you have a few quick and easy tips for post processing in Lightroom. Though these tips are meant for bird photography, they can work with any kind of photo!
Article By:- Photographytalk.com
No comments:
Post a Comment