1. Light Your Product

Natural light can create beautifully-lit images. (Photo Kim Olson)
Photography is nothing without light, so you’ll want to make sure you do a great job of lighting your products.
If you’re new to photography, I think it’s best to start off using natural light (aka the sun). Natural light is soft, always available (barring any major earthly catastrophe, of course), predictable and easy to work with. Pick your biggest north-facing window, put a table next to it and play around with how the light hits your product.
You can, of course, also use flashes and constant lighting (like lamps or actual photo lights). This way is trickier (you’ll want to avoid harsh, ugly shadows from direct flashes) and more costly (you’ll need additional equipment) but some prefer the added control.
Editor’s Note: Since I do most of my work after the kids have gone to bed, I usually take my photos at night using a cheap lighting system that you can get on Amazon.
2. Stage Your Product
It can be really helpful to buyers when you ‘stage’ your product by including other objects.
If you take a look at Steve’s store, you’ll notice his images often include flowers or dishes along with the linens he’s selling.
Staging can give your buyer more context in how your item is used. It can also help show the scale of your product.
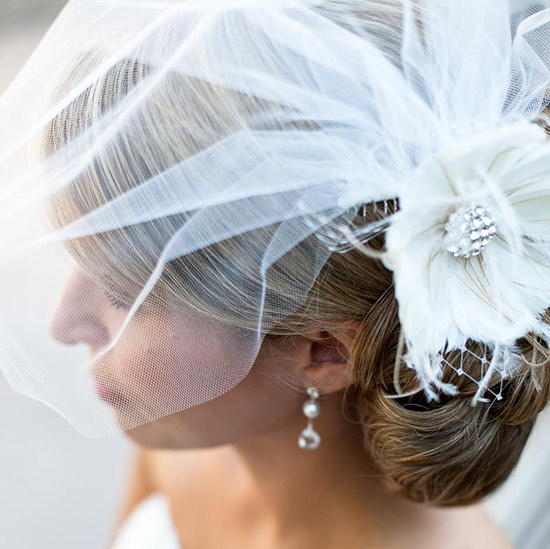
For example, if you’re selling something that people wear, it’s a great idea to take a picture of a model wearing it (either a mannequin or a real person). Since people usually aren’t good at imagining what it looks like on, you’ll be giving them a clearer idea of what to expect.

Showing your product being worn, like this bridal veil, helps your customer visualize how it will look. (Photo Kim Olson)
If you do decide to include other objects just be sure they don’t distract the viewer too much from the product itself.
3. Take Photos from a Lot of Different Angles
If you’re selling exclusively online, customers won’t be able to physically touch or handle your product so you’ll want to show them as much as possible about your item to help eliminate any questions or uncertainty.
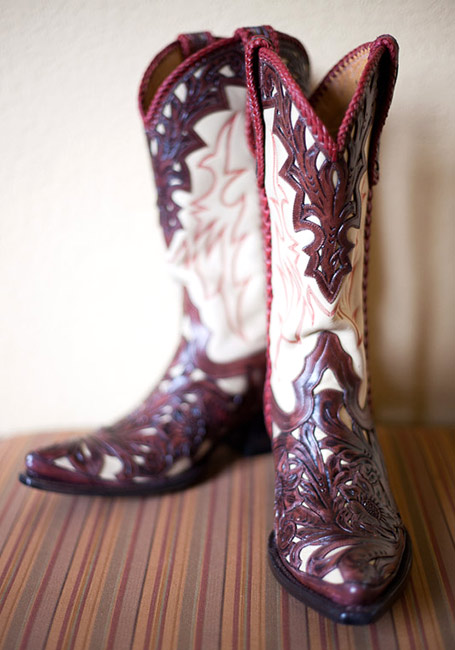
Go crazy with your photos and take many different angles of your product ie. shoot from the side, top, bottom, etc.

Cowboy boots with an intricate pattern and details. (Photo Kim Olson)
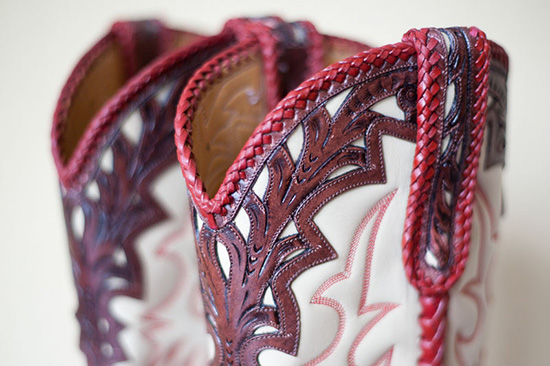
And don’t forget to include close-up shots. People love to see texture and the little details that make up your product. I know that when I buy online, a seller can almost never provide too many photos of a product, and photos are the first things I look at before buying anything online.

Cowboy boot detail. (Photo Kim Olson)
4. Be Careful with Your Background
What background should you use? Well, it depends.
Some people prefer an all-white background. It’s clean, simple and straightforward.
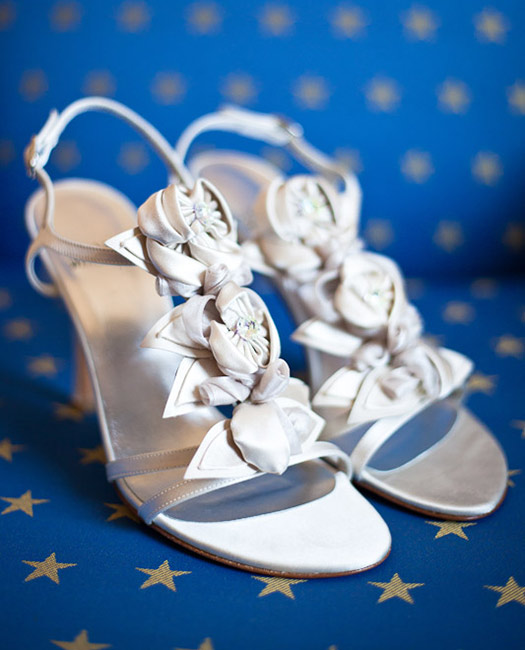
Others prefer to use backgrounds with patterns that complement the product.

Fancy wedding high-heeled shoes shot on a colorful background. (Photo Kim Olson)
Still others like to shoot ‘on location’, like outside in their backyards.
There are many different ways to achieve great shots and each has their own challenges and benefits, so it comes down more to personal preference and what works for your particular products.
Also remember to keep the background tidy and remove all distracting elements that may draw attention from your product (this will be especially important if you’re not using a backdrop).
5. Use a Tripod
I don’t normally advocate the use of tripods, but with product photography they can definitely come in handy – especially if you’re shooting a lot of products all at once.
The benefits of a tripod are:
- They keep the camera steady (blurry shots = unusable shots)
- They keep the camera in the same exact position so your angle will stay the same for every image
- They free up your hands so that you can reposition your products to take different angles
6. Make Sure Your Images are Sharp
One thing a lot of professional photographers are sticklers about is the sharpness of their images. There’s almost nothing worse than a blurry or soft photograph. It’s unprofessional and doesn’t do your product justice.
What you want to aim for is what is referred to as ‘tack sharp’ images, where your main point of focus is undeniably sharp.
The best ways to ensure your product photos are tack sharp are to:
- Hold the camera steady – If you have trouble with this, then use a tripod or set your camera down on something stable.
- Control your focus point – If you have a DSLR, you likely have the ability to choose a particular focus point within your frame. Use this to select the focus point closest to the area you want most in focus.
- Make sure you you’re shooting with enough light – The darker it is, the harder it will be for you to get your camera to focus properly, so be sure you’re photographing with enough light.
- View your image at 100% – After you’ve taken an image, use your camera’s viewfinder to zoom in to 100% and scroll around your image. Is your product sharp or does it look a bit soft? Because you’re probably shooting digitally, you can take as many photos as you need to to make sure you get your shot.
7. Edit Your Images
No matter how good of a photographer you are, most of your images can use a little cleaning up.
After you’ve taken your photos, open up your photo-editing program of choice (I use Lightroom and occasionally Photoshop, but even included or free programs like Windows Live Photo Gallery or Picasa will do fine) and do a little adjusting.
Here are some tweaks you may want to perform:
- Cropping – While it’s usually good to frame and compose your subject correctly when you’re taking your photo, it’s not always possible to get it just right. Now’s the time to crop tighter or straighten out your images.
- Exposure – If your photo is a little under-exposed (too dark) or over-exposed (too light), then use the exposure slider to adjust appropriately. Don’t go too crazy with it, though, usually a light touch will give the best results.
- Retouch – If you notice a bit of dust or other unwanted blob in your image, try finding and using the tool that helps you remove that. You don’t need a fancy editor to do this, either. I’ve found that the Windows Live Photo Gallery editor does a really good job of this – I was pleasantly surprised.
8. Be Consistent
There’s really no right or wrong way to take your photographs and the details of how you decide to take your photos is more of a personal one. But one really important tip I want you to keep in mind is to be consistent.
For example, whether you choose to photograph with an all-white background or not, make sure all of your images follow the same look. It’ll help give your shop a much more cohesive feel.
Spend a little time thinking about what you want to convey about not only your product but your brand. Your imagery will be a factor in how customers perceive your company so be sure your images reflect your message correctly.
This comment has been removed by the author.
ReplyDeleteGood post
ReplyDelete